Posts tonen met het label books. Alle posts tonen

17 juli 2012

Foto album

Het is dat ik geen naturel linnen had, anders had ik precies gemaakt met de stempels wat ik voor ogen had. Maar zo vind ik het ook mooi!

just made this picture with my PhotoPal for iPad

Een foto albumpje met losse bladen, waar je zoveel pagina's aan kunt toevoegen als je wilt. Of af en toe een gekleurde pagina er tussen.

just made this picture with my PhotoPal for iPad

Door de extra reepjes karton is er genoeg ruimte voor de foto's, zodat het niet snel open gaat staan.

just made this picture with my PhotoPal for iPad

Binnenkort in de shop!

Ik heb er trouwens nog meer in gedachten... Wacht maar eens af...

26 april 2012

Laptop on strike.

More new notebooks. The cherry is my favorite. They will be in th Etsy shop as soon as my laptop decides to cooperate.

just made this picture with my PhotoPal for iPad

just made this picture with my PhotoPal for iPad

just made this picture with my PhotoPal for iPad

just made this picture with my PhotoPal for iPad

just made this picture with my PhotoPal for iPad

17 april 2012

New books

In one of my last swaps on Swap Bot, I made a couple of notebooks. In a current swap you are supposed to send somethingbthat you have already made. So I'm sending another ntebook. And suddenly, I am all inspired again. So I am making some new small notebooks with 40 pages. Zakka style. And in true Mjammie, Koekjes style, you can send them to someone instead of a card. They come with a matching envelope!

just made this picture with my PhotoPal for iPad

just made this picture with my PhotoPal for iPad

By the way, the ladybug cookies are done! I will send them to the first one of the three who guessed 15 that will email me at maaike@mjammiekoekjes.nl!

14 augustus 2011

Laminated corner cover bookmark tutorial

You know what really ruins my reading experience and my day, while we're at it? If you are reading a book and the bookmark falls out... Especially if you were just coming to a really exciting part!!! And guess what... I have the solution!

And it's pretty too..

just made this picture with my PhotoPal for iPad

You will need some magazine pages you like (of course I used pages from Flow magazine!), a laminating pouch, a laminator and a knife or scissors.

just made this picture with my PhotoPal for iPad

Cut some strips of paper.

just made this picture with my PhotoPal for iPad

Fold them in half.

just made this picture with my PhotoPal for iPad

Place your corners (because that is what they will be, corner covers) in the laminating pouch. I usually make sure that the corners of the pouch are used, because they are nice and round. Also think about the sides that you want to stay open, you will cut them later, but it does matter how you place your strips in the pouch!

just made this picture with my PhotoPal for iPad

Now carefully pick up the laminating pouch and run it through the laminator. Try not to move the paper strips.

just made this picture with my PhotoPal for iPad

Now carefully cut the paper out. Leave the laminated edge on two sides and cut right to the paper on the other two sides.

just made this picture with my PhotoPal for iPad

Now you can slide your laminated corner cover bookmark over your page.

just made this picture with my PhotoPal for iPad

And voilà! If you close your book, the bookmark will stick out at the side and top! I will not guarantee that it will never fall out, but mine work like a charm!

just made this picture with my PhotoPal for iPad

Make different corners for your favorite recipes in a cookbook, or craft projects that you are planning to make, or doilies that you are planning to crochet.

I use mine for Flow magazine itself, because I could never finish that in one go!

13 februari 2011

Laminated mini notebook tutorial

just made this picture with my PhotoPal for iPad

Cool, huh? Now you can make your own! Make one for small ideas, for quotes, or just for your grocery lists! Recipes work well too... Use ads fron your favorite products as covers or pages from an old cookbook! Make a travel journal from your outdated atlas! The possibilities are endless!!!

Take out your laminating machine, a laminating pouch, two pieces of beautiful paper (I used two pages from my favorite magazine) and five sheets of plain paper. You van also use paper with lines, whichever you prefer. You'll also need a ruler, a needle, some floss or thread and a knife or scissors.

First off, cut the paper into small pages, 10 cm by 15 cm. Stack the pages.
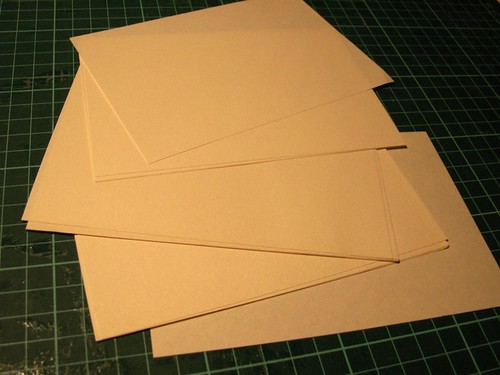
just made this picture with my PhotoPal for iPad

Laminate the two pages the same way you do with the ipad sleeve: place the pages wrong sides together in a laminating pouch and laminate them. Cut the laminated pages into strips, 21 by 10 cm.
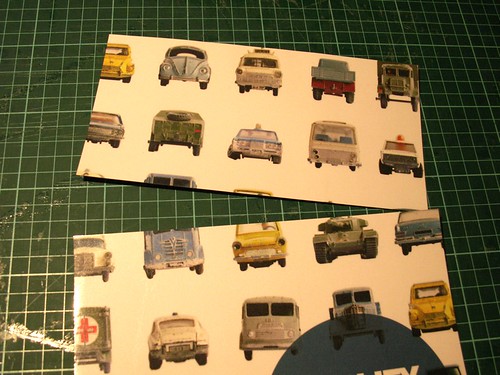
just made this picture with my PhotoPal for iPad

Take the top page and fold it in two. This will make sure that you punch the holes in the center of the page. Punch a hole through the page on the line using the needle, on 1 cm onder the top of the pages. Punch a next hole 2 cm below that one. Another 2 cm lower another one 2 cm below that one and a last one 2 cm lower, this one will be 1 cm above the bottom of the page.
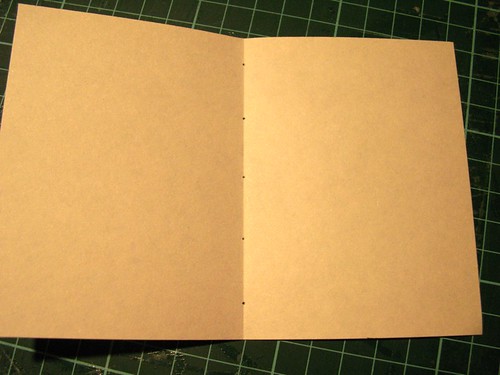
just made this picture with my PhotoPal for iPad

Place the page back on the stack and put the stack on the left side of your laminated cover. Punch again in the holes, now punching through all the pages at once.
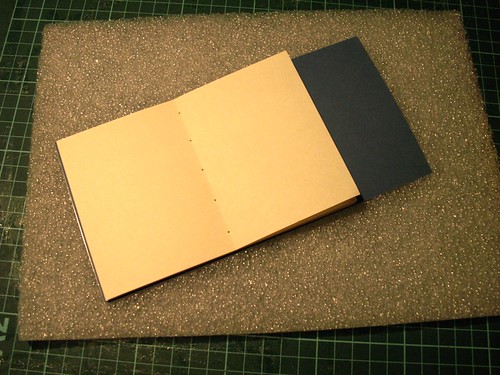
just made this picture with my PhotoPal for iPad

Thread the needle. Start sewing the pages together from the middle of the book, pull your needle through the stack and back through the next hole. Turn when you reach the end. Make sure that the thread is pulled tight and tie a knot in the middle of your page, where you started sewing.

Fold the book on the sewline. It will help your book to close easier if you leave it in between two heavy books for a night.

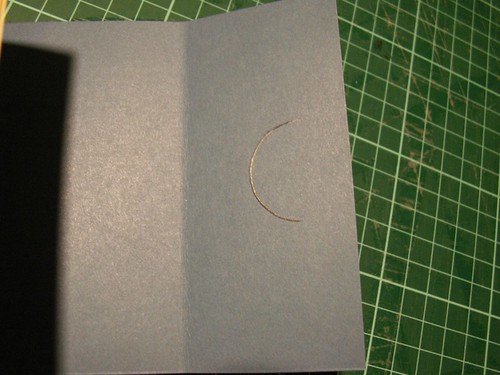
Cut a half circle and a slot in the cover.
just made this picture with my PhotoPal for iPad

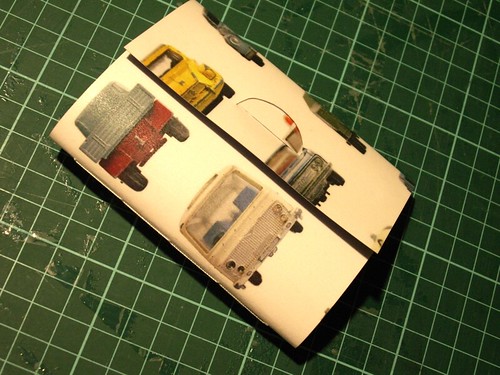
Fold the flap over, closing your notebook, use the needle to make markings where the slot should be, punching a small hole in the cover in the corners of your half circle. Open the book and make a cut between the two holes. Slide the half circle in the slot and have fun with your new mini notebook!!!
just made this picture with my PhotoPal for iPad

11 februari 2011

Guess what...

Finally I will reveal what this is...

just made this picture with my PhotoPal for iPad

And guess what... Shocker!!! It's a notebook! Duh! ;-)

And not just any notebook, it has a laminated cover! This is the notebook in all its glory...
just made this picture with my PhotoPal for iPad

And it's super easy to make!!! I'll tell you how to do that tomorrow, my ipad is refusing to upload the pics. Sorry!!! Tutorial will follow tomorrow!

8 februari 2011

The first ever Hoppin' Up giveaway!

Thank you all so much for your lovely comments on my Ipad sleeve! I do have lots of fun with the laminating pouches, but also I still enjoy making notebooks (you'd almost forget that it all started with the books)... And as a small token of my gratitude, I present to you... My first ever giveaway! Here's what you can win...

If you're the lucky winner, you can choose one of these three notebooks!

just made this picture with my PhotoPal for iPad

One of these you have seen before in this post, the other two are new, so I'll show you some more pictures first...

just made this picture with my PhotoPal for iPad

just made this picture with my PhotoPal for iPad

All you need to do is leave a comment to this post, and tomorrow evening, 10 PM CET I'll randomly draw the lucky winner!!!

Still working on the laminating things, so when this giveaway is over, I'll show you what this is... And how to make your own!
just made this picture with my PhotoPal for iPad

Ooooooh, my first teaser too! ;-)

3 februari 2011

Retro... Or vintage?

Am I the only one who is confused about that? Where does Vintage stop and Retro start? I am a very big fan of, as I like to call it, cheesy-oldfashioned. Whether that is vintage or retro. Like this fabric. It's not old, it's from some 2008 collection, but it looks so... Eh... Groovy?

The book will be available in my Etsy shop later today... Just in case anyone is interested...

just made this picture with my PhotoPal for iPad

7 januari 2011

A new book

Some time ago I added some leather covered notebooks to my Etsy shop. I love those, I am one of those people who like their notebooks to close in a way that the pages can't be damaged. But if you look for such a notebook on Etsy, you'll only find leather. And I think that leather covered notebooks are kind of boring (love 'em too, kind of a love-hate relationship, hehehehe). I prefer fabric covers. I've been thinking for a long time now how to make such a cover. I tried something that didn't come out as nice as I wanted it. So I started to figure out what makes leather such a nice material to work with in that way.

And last night, at 11.35, I finally found the answer and I was really frustrated that I had to wait until today to try it out!!!

I used olive coloured wool felt and 100% cotton fabric for the cover. I made a pocket on the front for business cards and snaps to shut it. I'm not sure I want to put it on Etsy, because I really like it myself. But then again, I really can't keep them all...

Photobucket
Photobucket
Photobucket

2 januari 2011

Books 'r Us

There are days that I feel like a warehouse! I told you some time ago that I bought some leather and I have been making books with those using my really totally cool Hoppin' Up buttons! And I have also made a cover with the delft blue and tulips patchwork... I'll give you some examples:

Book with tulip cover

just made this picture with my PhotoPal for iPad

just made this picture with my PhotoPal for iPad

More tomorrow!

9 december 2010

Playing with leather

Last week I noticed that I seem to sell more cahier style notebooks than regular books. I do love the leather covers, so I tried to make a couple of Cahier style notebooks with leather covers. It wasn't easy, since the leather has to be thinner than usual to get it to look good. And I only have two kinds of leather that are thin enough. I do like them though, but I'll be glad when the other colors that I ordered arrive, so I can make some nice red notebooks and other colors! TNT really picked a nice time to go on strike...

Photobucket
Photobucket
Photobucket
Photobucket
Photobucket